Creating a Watercolor Palette in 3 Easy Steps
What brand of paint do you use?
How do you organize your watercolor palette?
How do you create skin tones?
These are some of my most frequently asked questions and I’m answering them all today!
In this blog post, I’ll be sharing how I organize my palette for efficient color mixing, as well as share my go-to brands. I also created a downloadable Watercolor Palette Guide which lists the names of the colors I use, including skin tone colors! This PDF is perfect if you want to have a shopping list to take to the art store. With that said, let’s get started on how to organize your watercolor palette!
When working from the studio, I have about 3 different palettes that I paint with. This is because I have way too many colors and they don’t all fit into one palette! Instead of listing out every single paint tube I own, I want to share the go-to colors I have on my main palette.Since, I paint a lot of portraits, the colors in the palette will reflect that. If you’re planning on painting different subjects (like mountains, oceans, etc.), feel free to switch out the watercolors to better fit the subject you’ll be painting!

1. Start with a clean slate
Just like makeup, you want to start off with a clean base before applying your colors. If you have a new palette, take a microfibre towel and do a quick wipe down. If you want to go the extra mile, you can spritz it with a cleaning spray and wipe it down (this is totally optional). For those of you who will mostly be working out of your home, I love this large palette. If you don’t have a lot of desk space or plan on traveling with your palette, this smaller one is a great option.
2. Organize your colors
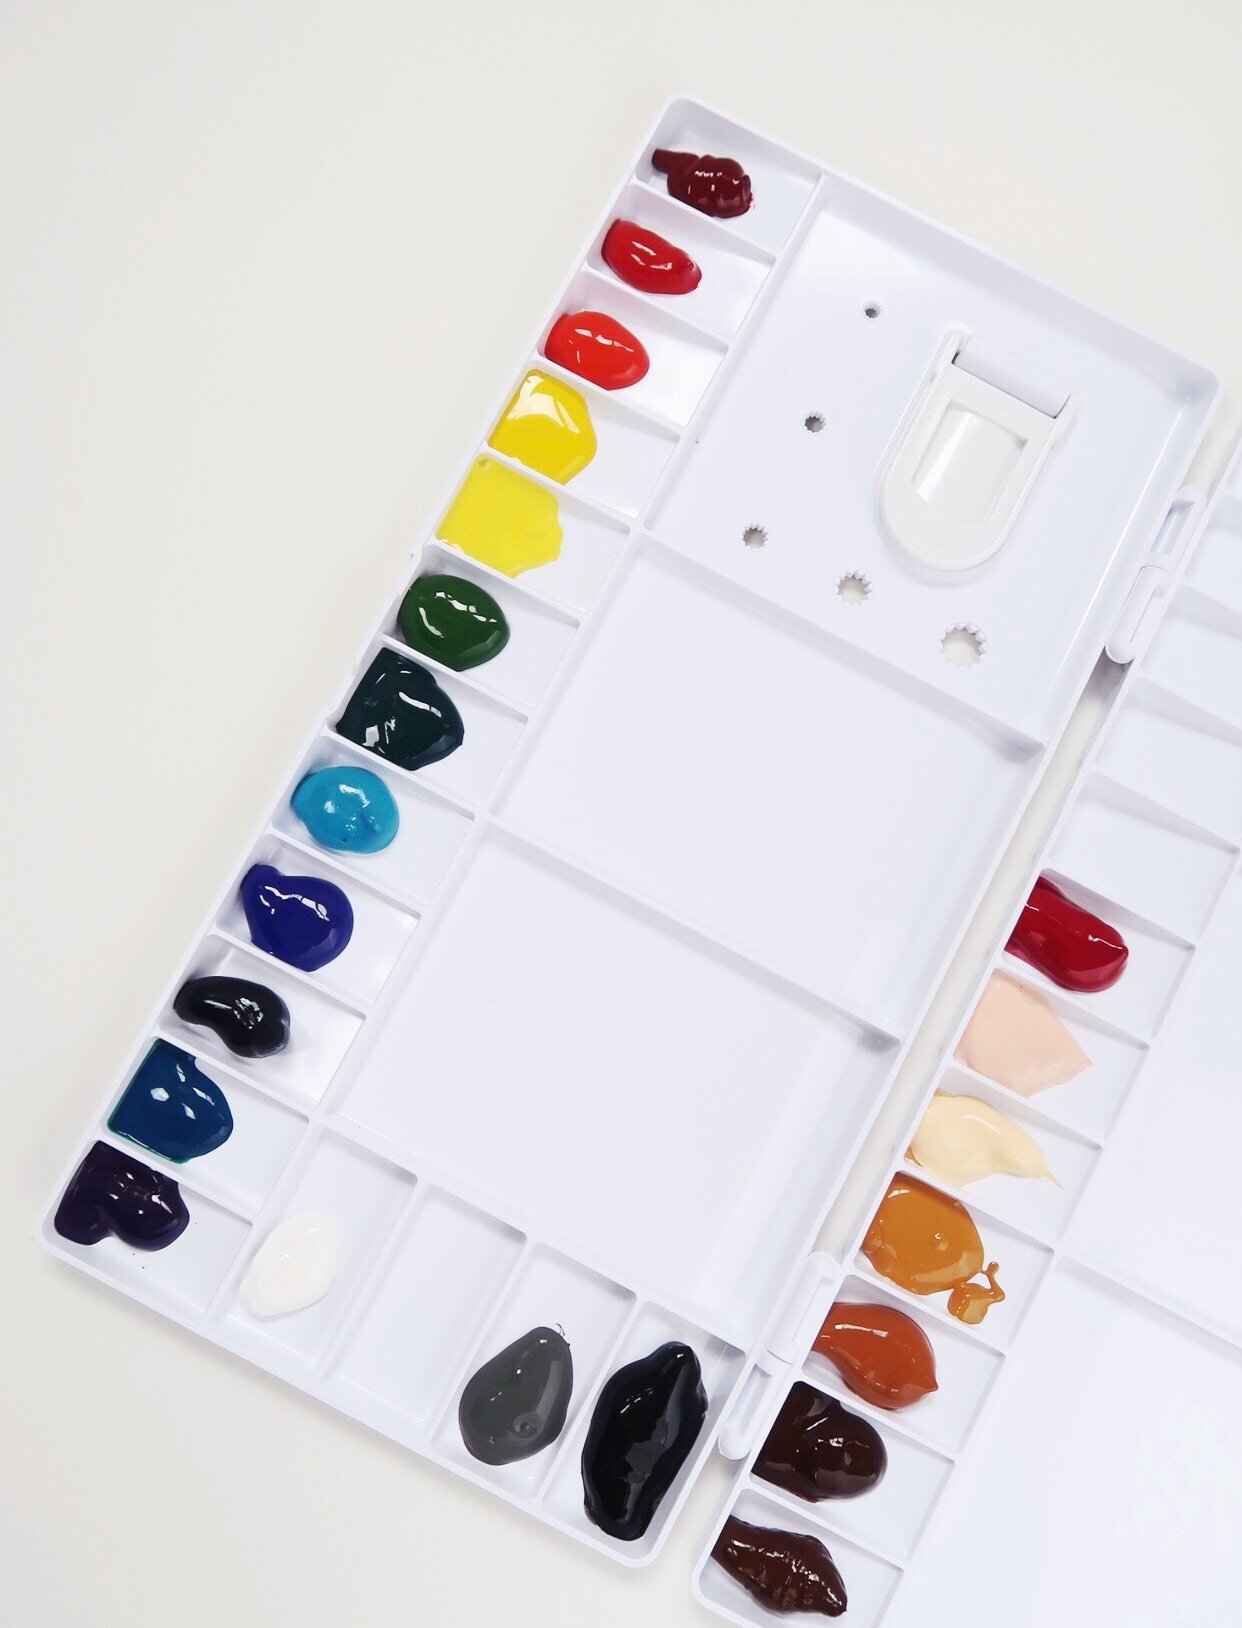
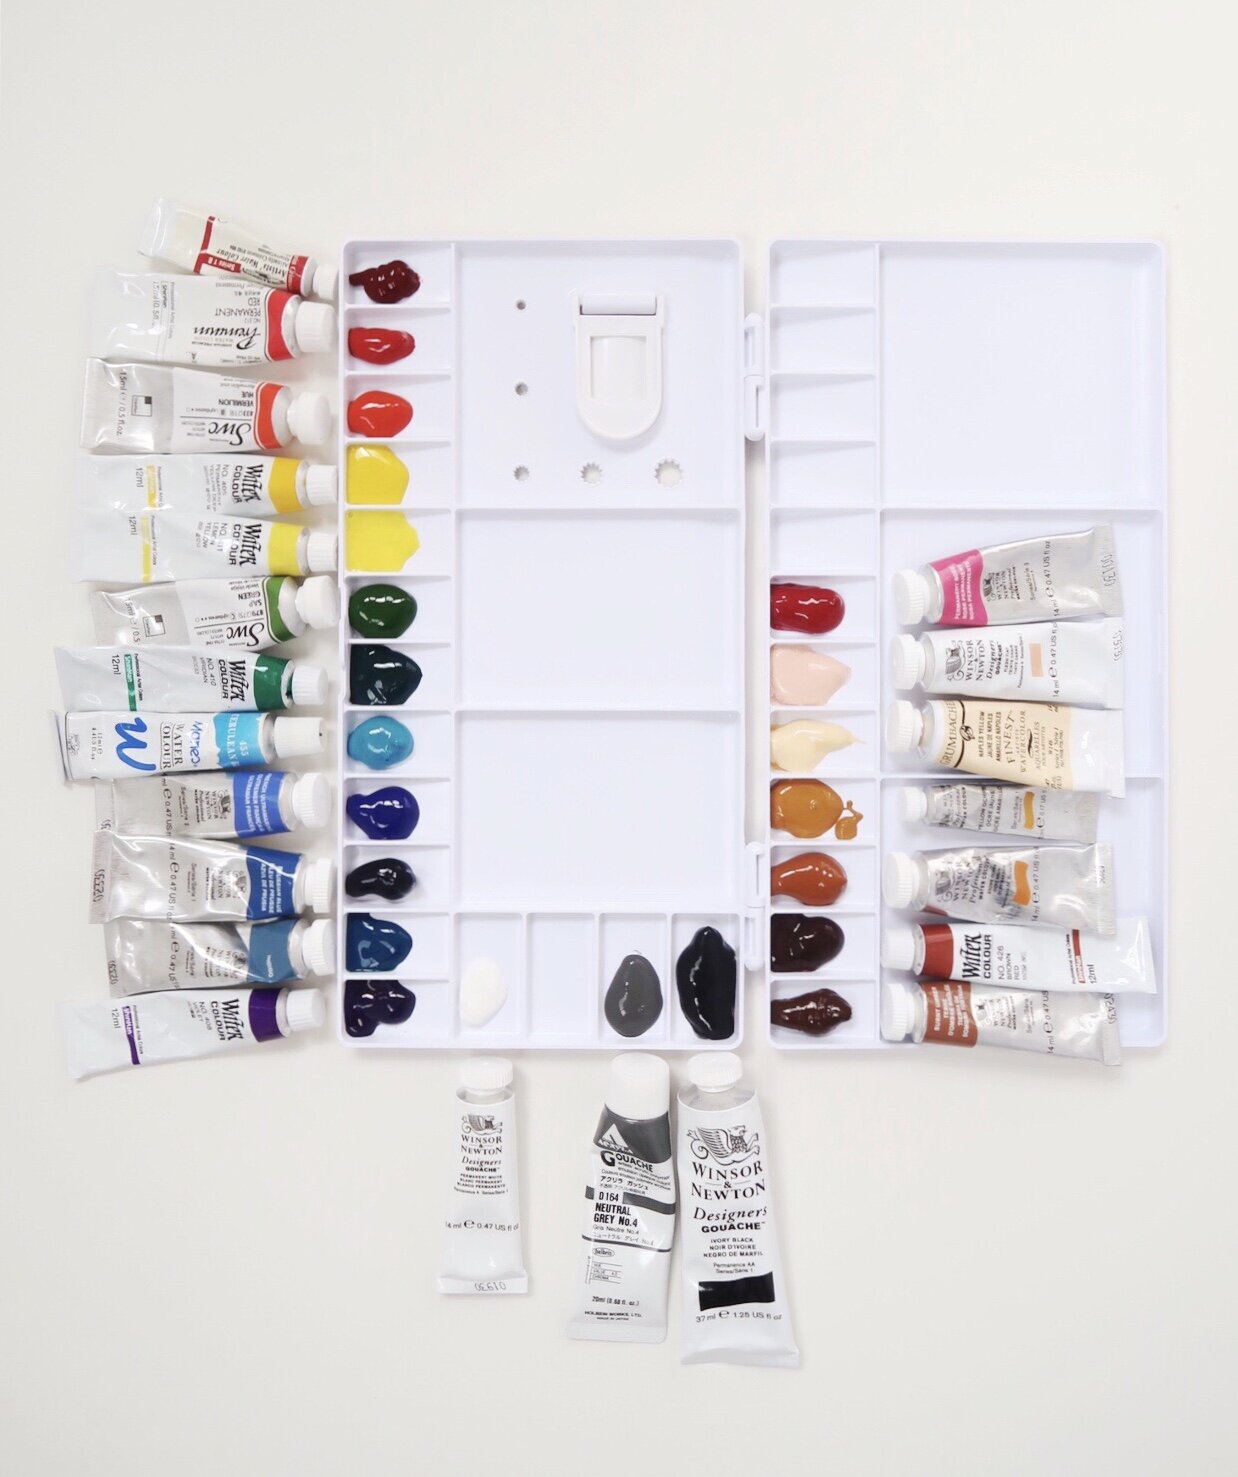
Before squeezing from the paint tubes, I like to organize the colors by temperature and map them out before application. Similar to the colors in a rainbow, I go from warm to cool colors. In a different section, I will organize my neutrals and skin tones for efficient color mixing.
Warm Colors (think warm like fire): red, orange, yellow
Cool Colors (think colors you see in nature): green, blue, purple
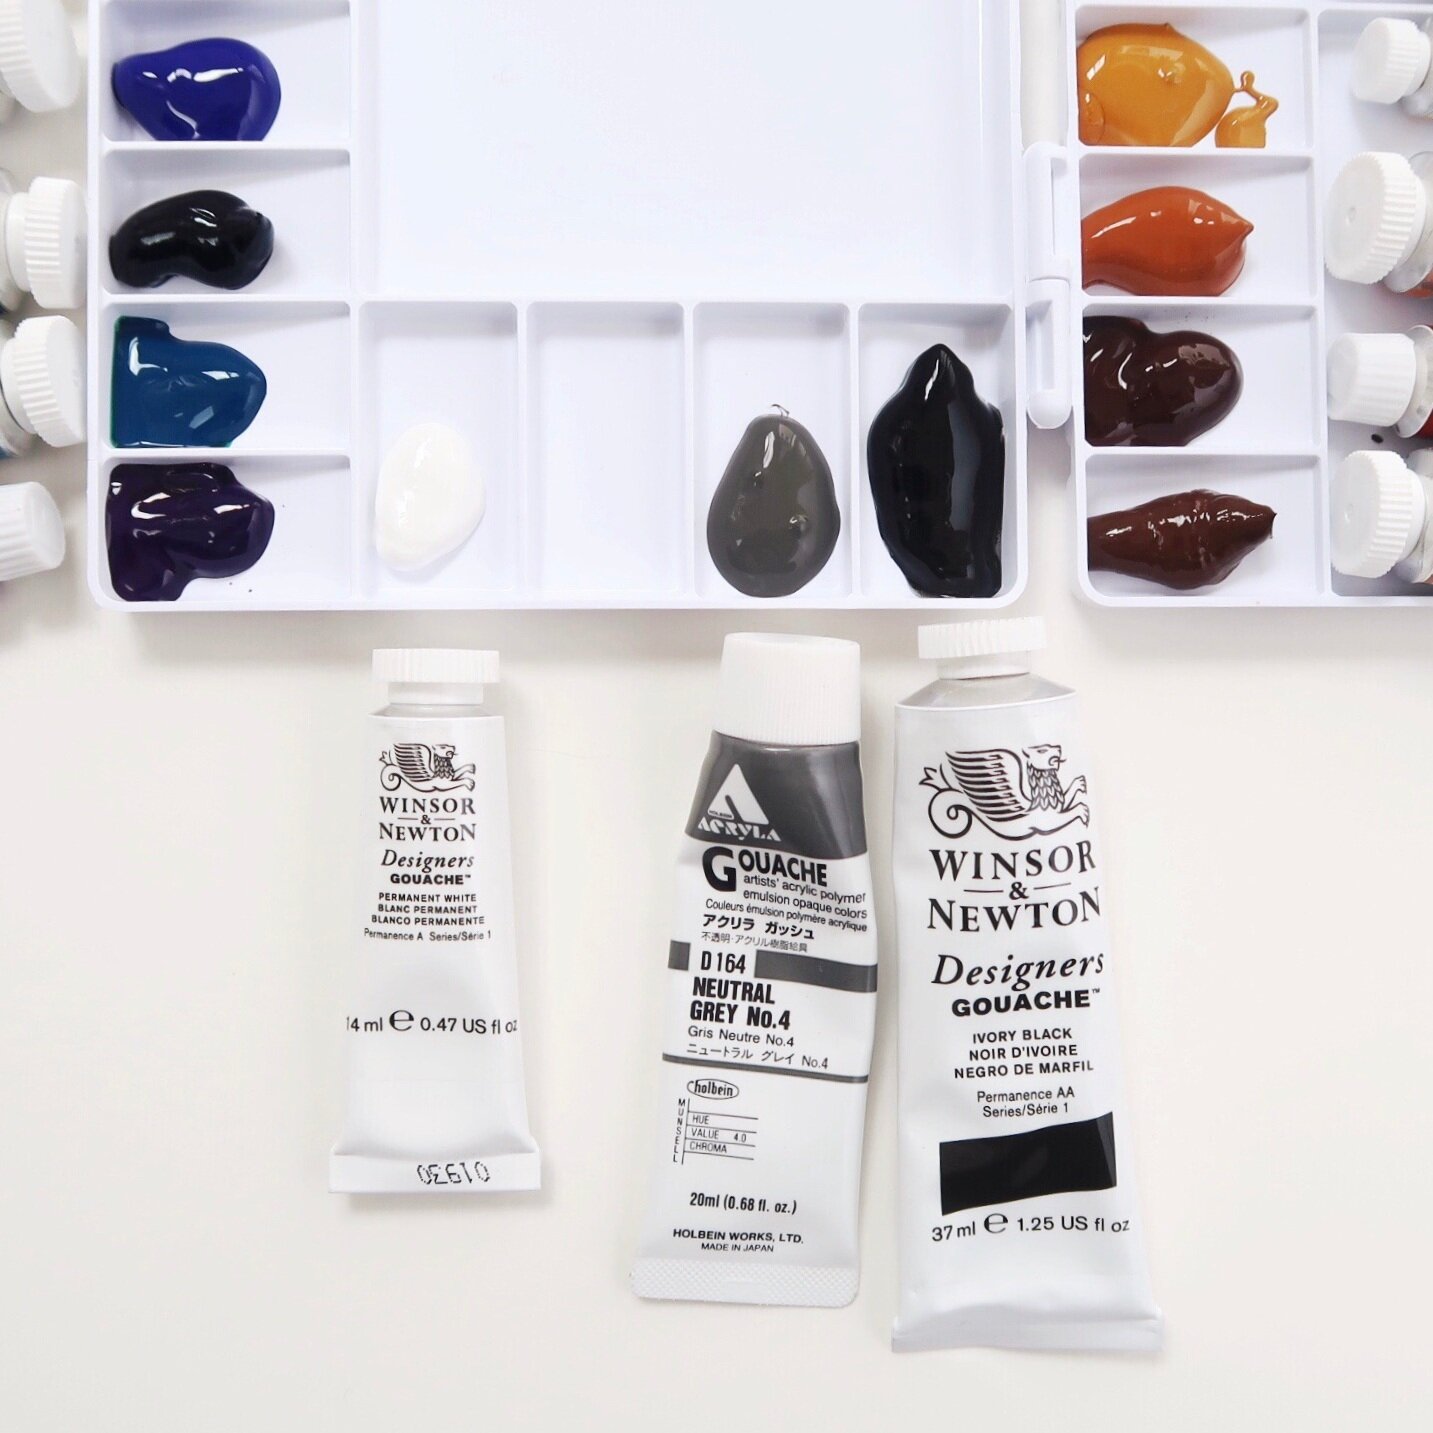
Neutrals (I use gouache for these): white, gray, black
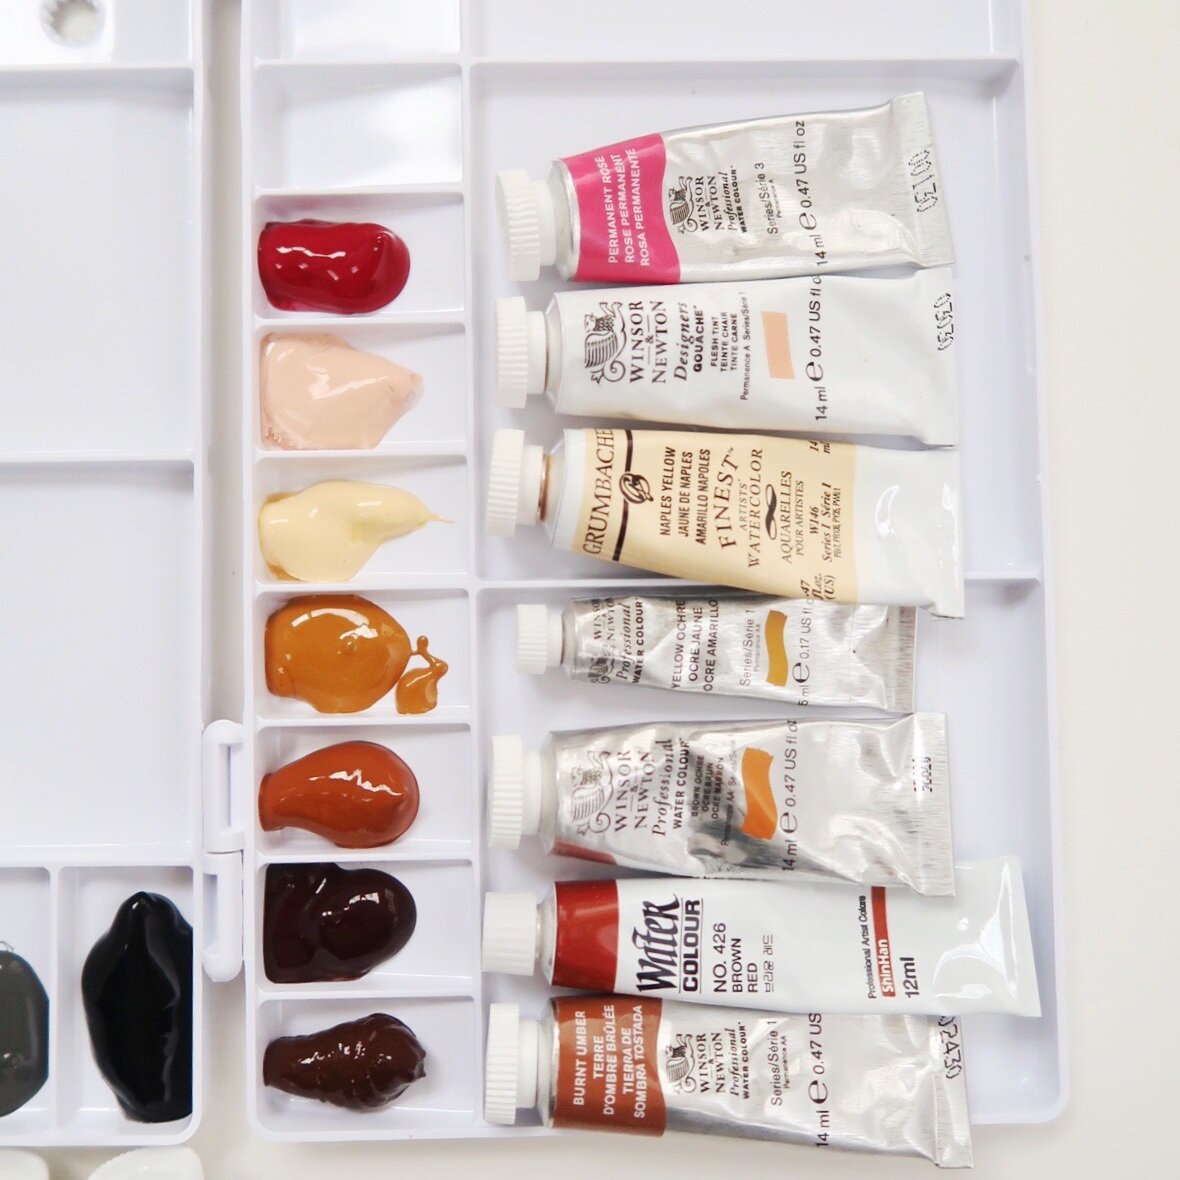
Skin tone (watercolor + gouache): variety of browns, yellow and pink/red to achieve skin tone colors
The quality of paint is KEY to creating beautiful and vibrant paintings. My go to brands are Winsor and Newton (Professional Grade) & a Korean brand called Shinhan. For the specific list of colors, download the Watercolor Palette Guide below.
3. Squeeze & Dry
Now that you have your colors organized, it’s time to put them down on the palette! I like to squeeze the tube from the bottom up (similar to toothpaste.) You just need a dollop of each color and can always refill as needed. Once the paint is down, let it dry for at least 24 hours before painting. If you dip your brush into freshly squeezed paint, you’ll pick up more paint than you need and you’ll end up going through it much faster. Instead, let it dry for at least a day and just add watercolor to activate!
I hope you found this blog post helpful and that it encouraged you to try to use watercolor! It’s my absolute favorite medium to use and I’m sure you’ll love it as well. If you have any other questions regarding watercolor or supplies, feel free to drop it down in the comment box below!